Clean and Care for a Microscope
Microscope Maintenance: What It Involves and Why It Matters
A microscope is only as good as its cleanest optical surface. A fingerprint on an eyepiece, a film of dried oil on an objective, or a bit of dust on the condenser can make a high-quality instrument look like a cheap one.
Microscope maintenance is the routine care that keeps an optical instrument clean, mechanically smooth and correctly aligned. It covers three areas: the optics (objective lenses, eyepieces, condenser), the mechanics (stage, focus knobs, nosepiece, arm), and the illumination (LED or halogen lamp, power supply, cables).
Good care protects image quality, extends the life of the instrument, and keeps results reliable. In a school or clinical lab it also supports consistent practice and audit-ready records.
The short answer: Blow off dust first, wipe lenses with lens paper lightly moistened with an approved lens cleaner using a spiral motion, remove immersion oil after every use, cover the instrument, and store it somewhere dry.
Who Needs This Guide
- Students and parents using a first microscope at home or in the classroom
- Teachers and lab managers looking after shared equipment
- Hobbyists working with prepared slides, pond water or electronics
- Clinical and industrial labs that need documented, repeatable care
The core steps are the same for everyone. What changes is how often you do them and how much paperwork surrounds them.
What You Need Before You Start
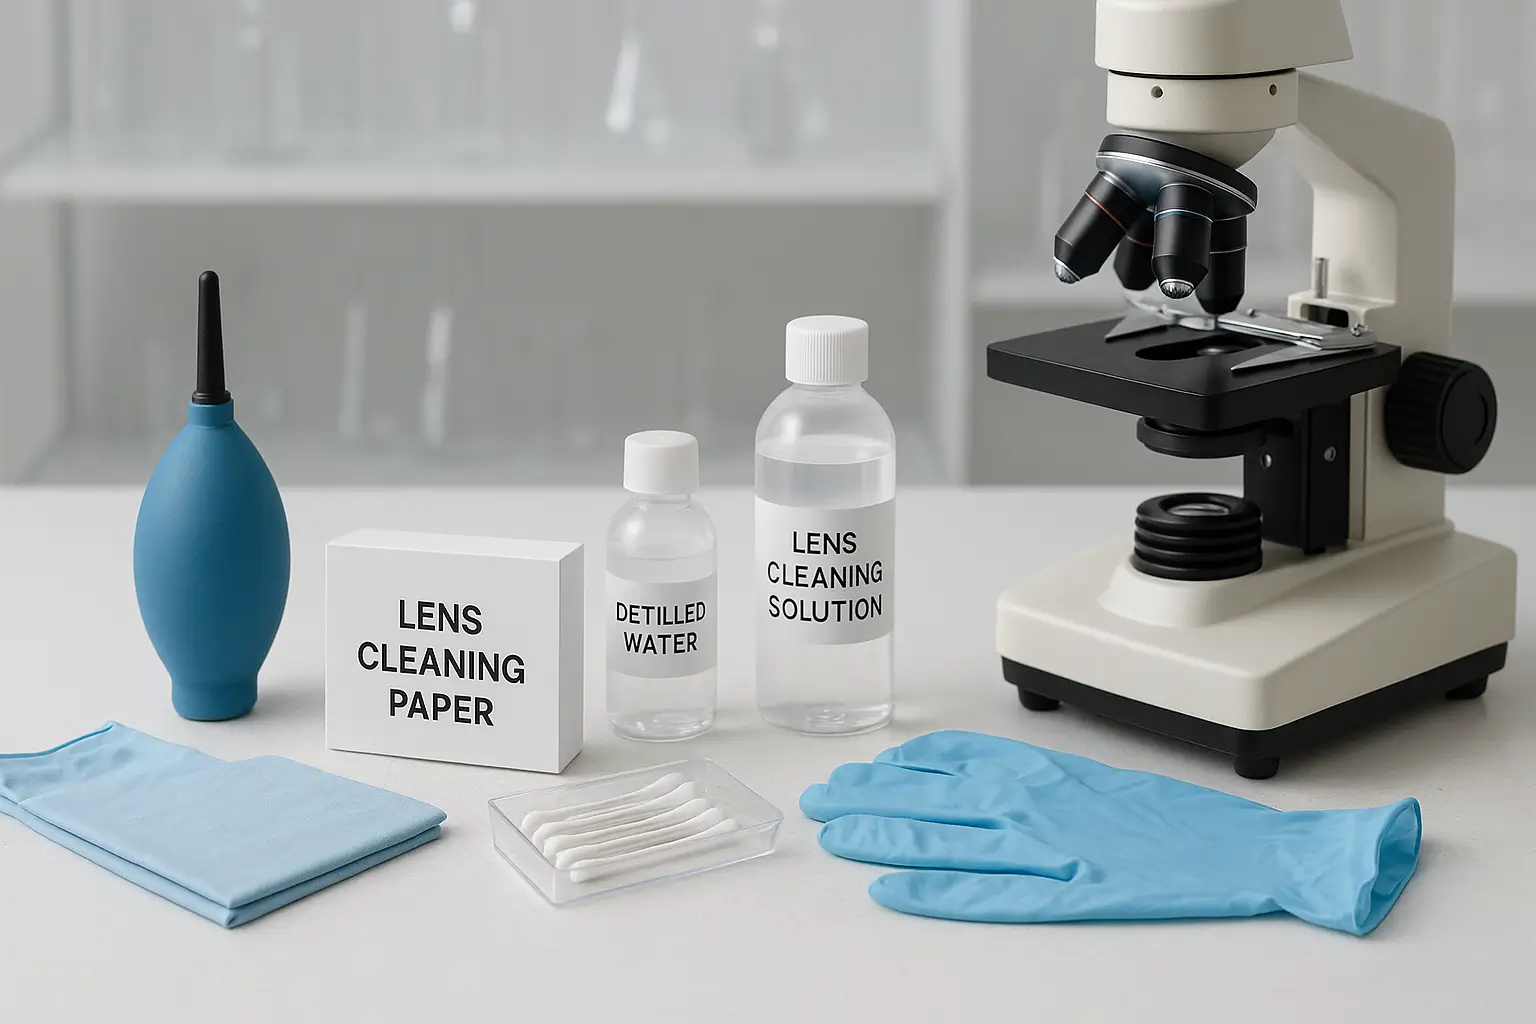
Cleaning goes wrong most often because of the wrong materials. Gather these first:
| Item | What it does | Note |
| Rocket blower bulb | Removes loose dust | Safer than canned air, which can spit propellant |
| Lens paper | Wipes optical surfaces | Never tissue, paper towel or clothing |
| Lint-free cotton swabs | Reaches edges and small lenses | Use a fresh one each time |
| Lens-cleaning solution | Dissolves oil and film | Pick one your manufacturer approves |
| Soft camel-hair brush | Clears dust from crevices | Keep it dry and clean |
| Microfiber cloth | Wipes body and stage | Not for lenses that still carry grit |
| Dust cover | Protects between uses | Vinyl or fabric |
| Silica gel (desiccant) | Absorbs moisture | Especially useful in humid climates |
Which Solvent Is Safe?
This is the most debated part of microscope care. Manufacturers differ: some recommend a commercial lens cleaner, others allow a small amount of isopropyl alcohol, and some suggest specific solvent blends for removing oil.
The safest rule is to read your manual. Lens coatings and the cement that holds lens elements together can be sensitive to certain solvents. Household glass cleaners, such as Windex, are not suitable for microscope optics.
The Everyday Care Routine
Small habits prevent most big problems.
After Every Session (about 2 minutes)
- Switch off the illuminator and let it cool.
- Lower the stage.
- Rotate to the lowest-power objective (usually 4x).
- Remove the slide.
- Wipe away any immersion oil.
- Put the dust cover on.
Weekly
- Dust the body, stage and base with a soft brush.
- Check the eyepieces and objectives with a flashlight for smudges.
- Check that the focus knobs turn smoothly.

How to Clean Microscope Lenses Step by Step
Use this method for objectives and eyepieces. It works for most student and laboratory instruments.
- Unplug and switch off the microscope.
- Blow away loose dust with the rocket blower. Wiping dry grit across glass is how scratches happen.
- Inspect the lens with a flashlight to see exactly where the dirt sits.
- Fold a fresh sheet of lens paper and add one or two drops of cleaner to the paper. Never spray or pour liquid onto the lens itself.
- Wipe in a spiral from the center outward, using a single pass.
- Discard the paper and repeat with a fresh sheet if needed.
- Dry-finish with a clean, dry sheet.
- Check the image with a known, clean slide.
Is the Dirt on the Eyepiece, Objective or Slide?
Before cleaning everything, find the source. This saves time and reduces wear on coatings.
- Rotate the eyepiece while looking through it. If the speck turns with it, the eyepiece is dirty.
- Move the slide. If the speck moves, it is on the slide.
- If neither changes, the objective, condenser or camera sensor is the likely source.
How to Remove Immersion Oil
The 100x oil-immersion objective is the lens most likely to need attention. Oil left on it can harden, collect dust, and in time creep into the lens housing.
- Lower the stage and rotate the nosepiece away from the slide.
- Blot the excess oil with dry lens paper. Press lightly and don’t rub.
- Wipe gently with fresh lens paper moistened with a manufacturer-approved solvent.
- Finish with a dry sheet and inspect under light.
If oil reaches a dry objective such as a 40x, clean it straight away. Dry objectives are not designed to work with oil, and residue can cloud the image.
Cleaning the Rest of the Microscope
Stage and Slide Clips
Wipe the stage with a slightly damp microfiber cloth. Remove the clips if you can and clean beneath them, where spilled liquids and mounting media collect.
Body, Arm and Base
Use a soft cloth with a little mild soap and water, then dry thoroughly. Keep liquid away from joints, knobs and electrical openings.
Condenser and Diaphragm
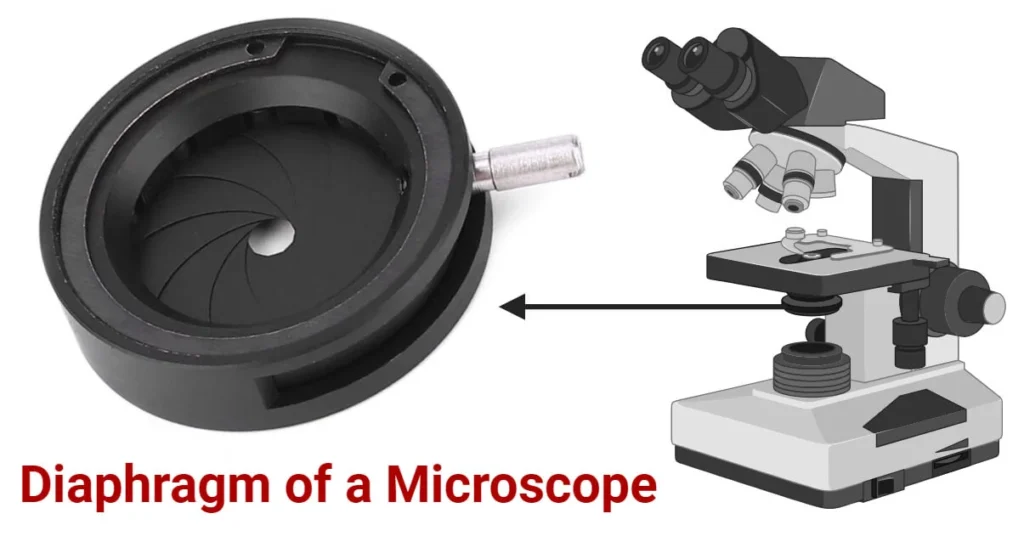
Dust with a blower. The top lens of the condenser can be cleaned like an objective. If the lighting looks uneven, the condenser may need to be re-centered following your manual’s Köhler illumination steps.
Illuminator
Allow lamps to cool fully before touching them. Never handle a halogen bulb with bare fingers, since skin oils shorten its life.
Focus Mechanism
Avoid oiling the coarse and fine focus yourself unless the manual says so. Gritty or stiff focus is a job for a technician.
Care by Microscope Type
Most guides treat all microscopes the same. They are not.
| Type | Special care |
| Compound (student or lab) | Remove oil after use, check condenser alignment, replace lamps as needed |
| Kids’ microscope | Plastic lenses scratch easily. Use a blower and dry lens paper or microfiber, and avoid solvents unless the manual allows them |
| Stereo (dissecting) | Keep large objective faces covered; wipe stage plates after wet specimens |
| Digital, USB or handheld | Clean the lens with a lens pen or dry paper, protect ports from liquid, and avoid straining the cable |
| Inverted | Keep spills away from the open stage, since objectives sit directly below the specimen |
Storage and Transport
Where the microscope sleeps matters as much as how you clean it.
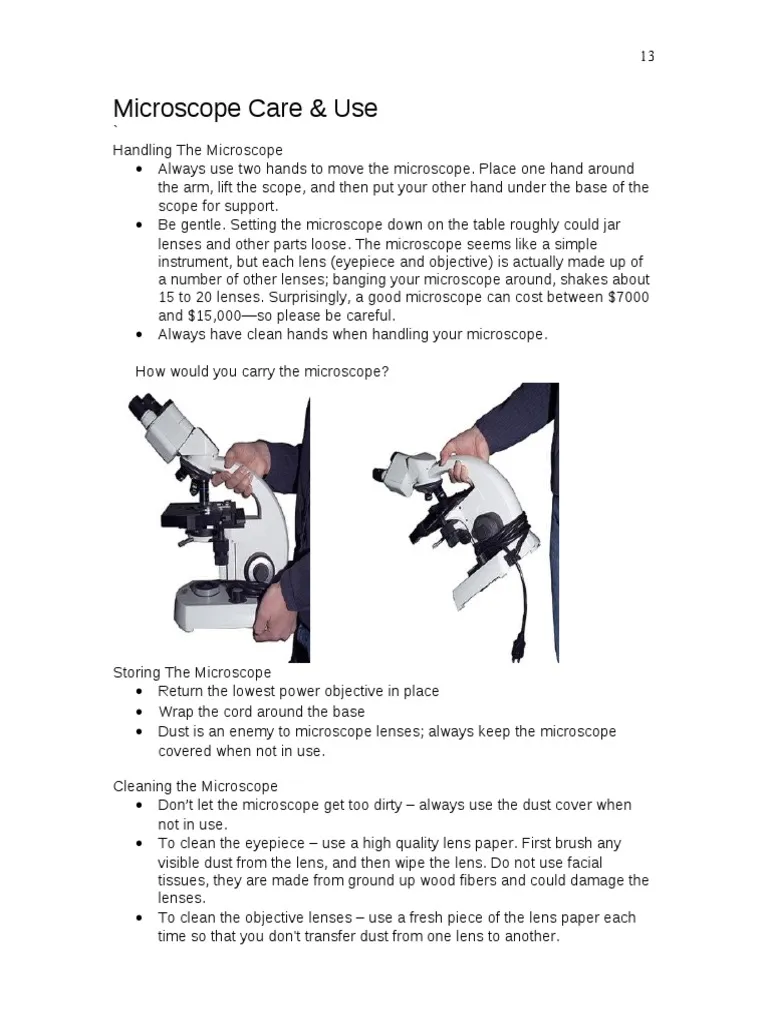
- Store it in a dry, dust-free, temperature-stable room.
- Keep it away from direct sunlight, kitchens, bathrooms and open windows.
- Use a dust cover or carrying case. Place caps on empty eyepiece tubes.
- Leave the stage lowered and the lowest objective in position.
- Carry with two hands: one grips the arm, the other supports the base.
Humidity, Fungus and Climate
Lens fungus is one of the most expensive problems, and it grows where air is warm and damp. Once it etches into the glass or coatings, it is often permanent.
- Humid and monsoon regions: store with silica gel, use an air-conditioned or dehumidified room where possible, and inspect lenses monthly.
- Dry and dusty regions: keep the cover on at all times and use the blower more often.
- Cold climates: let the microscope reach room temperature before use. Moving it from a cold car or store room into a warm lab causes condensation on the optics.
Troubleshooting: Symptoms, Causes and Fixes
| Symptom | Likely cause | What to do |
| Blurry image | Dirty objective, eyepiece or slide | Clean in turn; test with a clean slide |
| Specks that rotate | Dirty eyepiece | Clean the eyepiece |
| Specks that stay put | Dirty objective, condenser or sensor | Clean the objective; check the condenser |
| Hazy view at 100x | Oil residue or mixed oils | Remove old oil and re-clean |
| Uneven lighting | Misaligned condenser or dirty lamp window | Re-center per the manual; clean the window |
| Hard or gritty focus | Dried grease or worn parts | Service by a technician |
| Web-like patterns inside optics | Fungus | Professional cleaning |
| Image drifts out of focus | Loose tension collar | Adjust the tension, or have it serviced |
Why Is the Image Still Blurry After Cleaning?
If the view has not improved, the problem may not be surface dirt. Check that the slide is the right way up, that the coverslip is clean and the correct thickness, and that the correct oil is being used only with the 100x objective. Persistent haze after careful cleaning usually points to something inside the optics.
Common Mistakes to Avoid
- Using tissue, paper towels or clothing on lenses
- Spraying cleaner directly onto optics
- Wiping dry dust without blowing it off first
- Using too much solvent, which can seep into lens cement
- Taking apart objectives or eyepieces
- Forcing a stuck focus knob
- Leaving oil on the 100x objective overnight
- Storing the microscope without a cover or in a damp room
Over-cleaning is a mistake too. Each wipe wears coatings slightly. If a faint smudge doesn’t affect the image, leave it until it does.
Maintenance Schedule
| Frequency | Task |
| After each use | Wipe oil, lower stage, lowest objective, cover |
| Weekly | Dust the body, inspect lenses |
| Monthly | Clean external lenses if needed, wipe stage and base |
| Every six months | Check the lamp, cables and stage movement |
| Annually (heavy use) | Professional service and alignment |
Quick Checklist
- ☐ Light off and unplugged
- ☐ Lowest-power objective in place
- ☐ Oil removed from the 100x objective
- ☐ Eyepieces and objectives free of smears
- ☐ Stage and base wiped
- ☐ Dust cover on
- ☐ Stored somewhere dry
For Labs and Institutions
Shared and clinical instruments benefit from a simple maintenance log: date, user, task done, and any fault noticed. Pair it with your lab’s standard operating procedure and keep service records, which helps during inspections or accreditation reviews. Where slides involve biological material, follow your site’s disinfection rules before cleaning.
DIY Cleaning or Professional Service?
Clean it yourself when the issue is dust, fingerprints, light oil residue or a dirty stage.
Call a technician when:
- You can see fungus inside the optics
- The image stays hazy after careful external cleaning
- Focus is stiff, gritty or slipping
- There are electrical faults or flickering light
- The instrument is expensive, clinical-grade or under warranty
| DIY | Professional | |
| Advantage | Free, quick | Internal cleaning, lubrication, alignment |
| Risk or drawback | Scratches or misalignment if done wrongly | Cost and downtime |
Costs: Basic cleaning kits are generally inexpensive, while professional servicing varies widely by country, brand and condition. (Source: local service provider quotes.)
Finding a Service Provider
If you search for microscope repair near you, you will typically find authorized manufacturer service centers (brands such as Olympus/Evident, Nikon, Zeiss, Leica, Motic and Meiji), independent optical technicians, scientific equipment suppliers, and university instrumentation labs. Ask about experience with your brand, effects on the warranty, turnaround time, and whether they offer pickup or on-site service.
Practical User Experience
In everyday use, the habits that make the biggest difference are also the simplest. Covering the microscope after every session and wiping oil off the 100x objective straight away prevent most of the hazy images people blame on a “bad lens.”
Cleaning goes more smoothly when you work in good light. A small flashlight held at an angle makes smudges and dust easy to see, so you clean only what actually needs it. Blowing dust off first, then using a single spiral pass with fresh lens paper, tends to leave fewer streaks than repeated wiping.
Beginners often find it hard to tell where a speck is coming from. Rotating the eyepiece, then moving the slide, narrows it down within a minute and avoids unnecessary cleaning of the objectives.
Plastic-lensed student and kids’ models need a lighter touch. They respond well to a blower and dry lens paper, but they scratch more easily than glass, so solvents are best avoided unless the manual allows them.
The main limit of home care is internal problems. Fungus, rough focus and haze that survives careful cleaning are best left to a technician.
Overall impression: Microscope care is quick and forgiving once the routine becomes a habit. A few minutes after each session keeps the image sharp, and knowing when to stop cleaning and call a professional protects the instrument as much as the cleaning itself.
Frequently Asked Questions
1.ow often should a microscope be cleaned?
Wipe up oil and cover it after every use, dust it weekly, and clean lens surfaces only when you see a problem. Cleaning too often wears coatings.
2.What do you use to clean a microscope lens?
Lens paper with a manufacturer-approved lens cleaner, after blowing off dust with a rocket blower.
3.an you use alcohol on a microscope lens?
Only if your manufacturer allows it. When approved, use a very small amount on lens paper, never poured onto the lens.
4.an you use Windex or glass cleaner on a microscope?
No. Household cleaners are not designed for optical coatings and can leave residue or damage them.
5.How do you remove oil from a microscope lens?
Blot with dry lens paper, wipe lightly with paper moistened with an approved solvent, then finish dry.
6.Can you clean the inside of a microscope?
Not safely at home. Internal cleaning and fungus removal need a trained technician.
7.How do you prevent fungus on microscope lenses?
Keep the instrument dry, covered and ventilated, and use silica gel in humid environments.
8.How do you store a microscope?
Covered, in a dry room away from sunlight, with the stage lowered and the lowest objective in place.
9.Why is my microscope blurry after cleaning?
Check the slide, coverslip and oil use first. If the haze remains, the problem may be inside the optics.
10.Can I use a cotton swab on a lens?
Yes, if it is lint-free and fresh each time. Avoid cotton balls and rough swabs.
Conclusion
Microscope care comes down to a few reliable habits: blow before you wipe, use lens paper, go lightly with solvents, remove oil right away, and store the instrument dry.
Your next steps:
- Gather a blower, lens paper and an approved cleaner.
- Start a two-minute end-of-session routine.
- Add a dust cover and, if your climate is humid, a desiccant.
- Keep a simple schedule or log.
- Book a professional service if you notice fungus, stiff focus or haze that cleaning won’t fix.
A few minutes of care each week keeps the image sharp and the instrument ready for years.
These information are gathered from different surveys, medical tests and tech giants like Techradar and more. Our top priority is to provide you valuable information about Handheld Microscope.
For More Details About Different Digital Microscopes Click Here