Best Microscope for Home Use Beginners: What to Buy and Why
Article Body
Buying a first microscope should be exciting. Instead, most people end up staring at a wall of listings that all promise “2000x” and a free carrying case.
The good news: choosing well is simpler than it looks. This guide explains what to buy, why it matters, and how to match the instrument to what you actually want to see.
The Short Answer
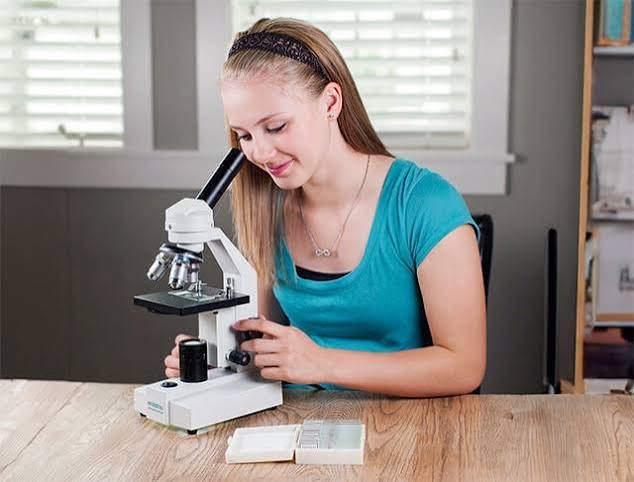
The best microscope for home use for beginners is a glass-optics compound microscope with 40x to 1000x magnification, LED lighting and a mechanical stage. If you mostly want to inspect insects, coins or rocks, a stereo microscope is the better choice.
What Counts as a Home Microscope?
A home microscope is an optical instrument built for learning, hobby science and light inspection work rather than clinical or industrial use. It enlarges small things so you can see structure the naked eye misses.
Most beginner models fall into four families: compound, stereo, digital and handheld. Each answers a different question, and picking the wrong family is the most common first-time mistake.
Who Needs One, and When It Makes Sense
A beginner microscope suits more people than you might expect:
- Adult hobbyists curious about pond water, plant tissue and fibers
- Parents and homeschooling families building a science corner
- Students in high school or early college biology
- Tutors, small learning centers and maker spaces that need an affordable demonstration scope
- Nature lovers who want a closer look at leaves, pollen and insects
It makes less sense if you only want a quick magnified look at a printed page or a stamp. A simple magnifier or a phone macro lens may be enough in that case.
The Four Types of Beginner Microscopes
Compound Light Microscope
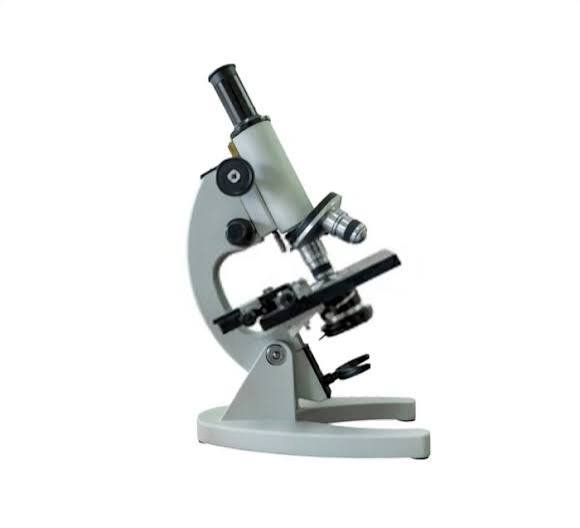
This is the classic instrument. Light passes up through a thin, translucent specimen on a glass slide, then through an objective lens and an eyepiece.
It is the best choice for cells, microorganisms, pond water and prepared slides. Typical magnification runs from 40x to 1000x. The trade-off is that your sample must be thin enough for light to pass through, and the image is usually flipped and reversed.
Stereo (Dissecting) Microscope
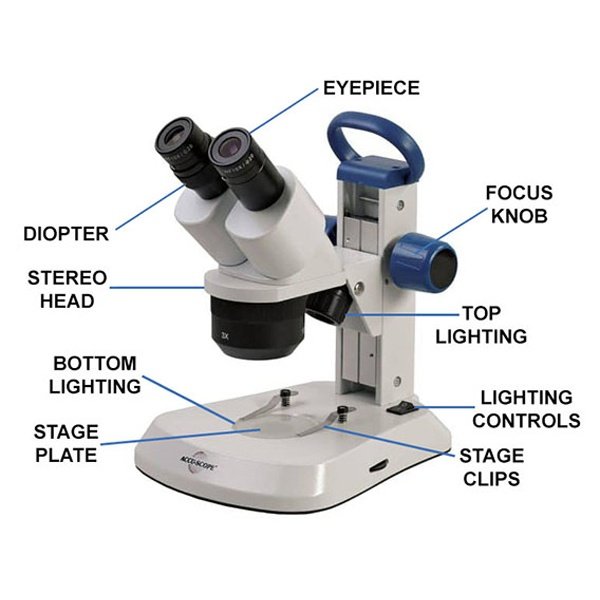
A stereo microscope has two optical paths, which gives a three-dimensional, upright view of solid objects. Magnification is lower, usually 10x to 40x, but the working distance is generous.
It shines with insects, coins, stamps, minerals, circuit boards and craft work. It cannot show cellular detail.
Digital and USB Microscopes
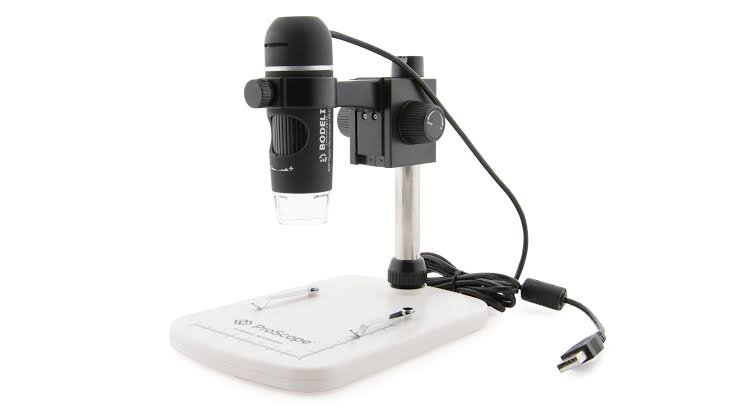
A camera sensor sends the image to a screen. That makes sharing easy, which helps in classrooms, tutoring sessions and family projects.
Quality varies widely. Watch for “digital zoom” numbers, which describe cropping the image, not true optical magnification.
Handheld and Pocket Microscopes
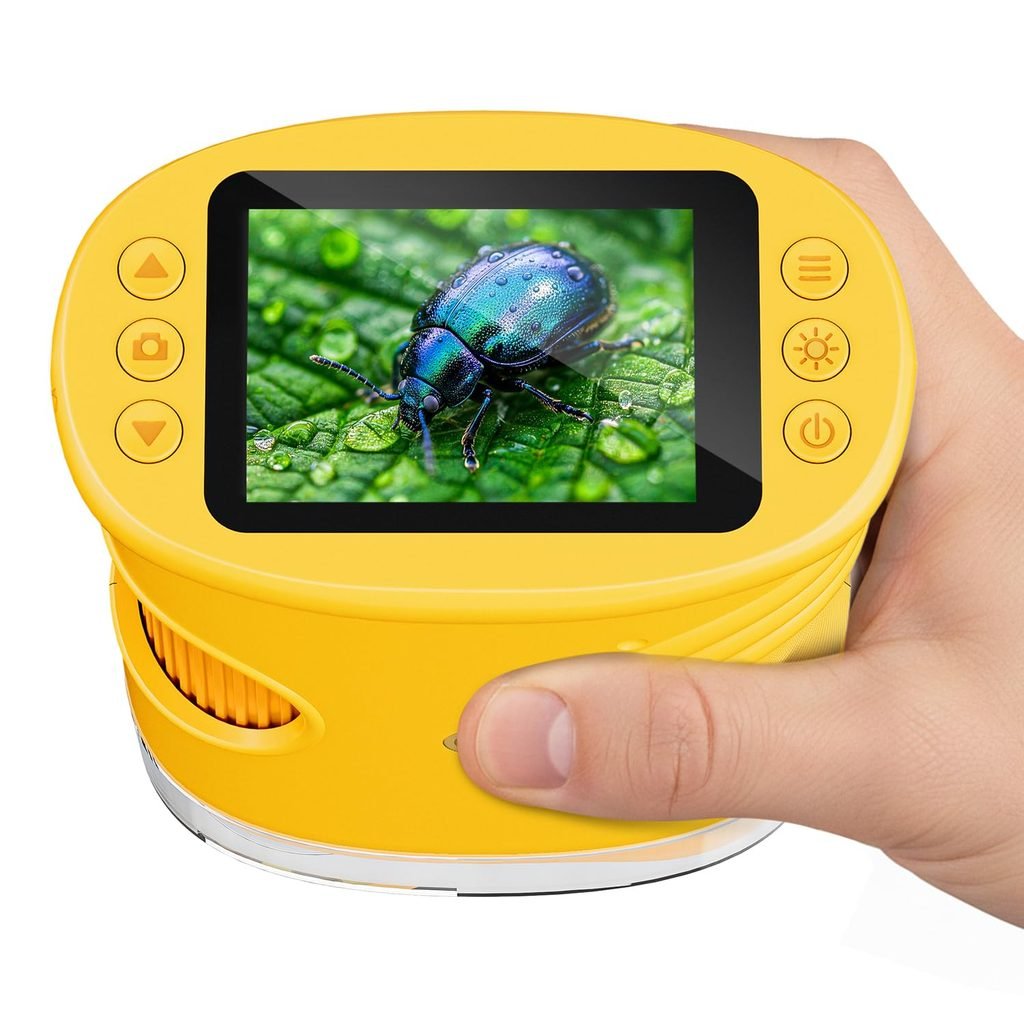
These small devices, often 30x to 100x with an LED, are handy outdoors. They are fun and portable, but they are not a replacement for a real compound scope.
How a Compound Microscope Works
Knowing the basics helps you read a spec sheet with confidence.
- Illumination: an LED (or mirror) lights the specimen from below.
- Condenser and iris diaphragm: these focus the light and control contrast.
- Objective lens: usually 4x, 10x and 40x, sometimes 100x for oil immersion. It forms the first magnified image.
- Eyepiece (ocular): typically 10x, it magnifies that image again.
- Total magnification: objective power multiplied by eyepiece power. A 40x objective with a 10x eyepiece gives 400x.
The objective does most of the quality work. That is why two scopes with the same printed magnification can look completely different.
Magnification vs Resolution: What Beginners Get Wrong
Magnification makes an image bigger. Resolution decides whether that bigger image shows more detail.
Resolution depends on the objective’s numerical aperture (NA), a measure of how much light the lens gathers. A higher NA separates fine detail better. This idea traces back to the work of Ernst Abbe, who described the physical limits of light microscopes.
Here is a simple way to picture it. Enlarging a blurry photo on a screen makes it bigger, but not sharper. That is empty magnification.
It is why a 2000x claim on a budget scope usually means a bigger blur, not more detail.
What You Will Really See at Each Power
| Total magnification | What it reveals |
| 40x | Whole small objects: insect wing, fabric weave, pollen clusters |
| 100x | Plant tissue layout, larger pond organisms, fiber structure |
| 400x | Individual plant cells, protozoa, algae, stained cheek cells |
| 1000x (oil immersion) | Bacteria shapes, if optics and technique are good |
For most home users, 40x to 400x is where the best views live. Viruses are far too small for any light microscope, and bacteria are only just within reach.
A Decision Framework: Pick by What You Want to See
Work through these steps in order.
Step 1: Match the type to the specimen
- Thin or transparent samples (cells, water drops, leaf peels): compound
- Solid or opaque objects (insects, coins, minerals): stereo
- A mix of both: a compound scope plus a cheap handheld or stereo scope
Step 2: Think about who will use it
Young children do best with a sturdy, simple model and adult supervision. Teens and adults benefit from glass optics and a mechanical stage. A binocular head reduces eye strain if several people share the scope.
Step 3: Set a budget band
Decide whether you are buying for casual curiosity, serious learning, or a shared classroom or tutoring setup. The price section below shows what each band usually buys.
Step 4: Decide if you want to photograph or share
If yes, look for a trinocular head, a camera port, or a model sold with a compatible camera.
Step 5: Check support before you pay
Confirm that bulbs, slides, cover slips and replacement parts are available where you live, and read the warranty and return terms.
The Specs That Actually Matter
Glass optics
Glass lenses give sharper, brighter images than plastic ones. Plastic objectives are common in toy-grade sets and cap the quality you can reach.
Mechanical stage
A stage with X-Y control knobs lets you move a slide in tiny steps. At 400x, this one feature makes the difference between enjoyable and frustrating.
LED illumination
LED is the modern standard: cool, bright and long-lasting. Models with both lower and upper light handle thin slides and solid objects.
Coarse and fine focus
Two knobs let you find the image, then sharpen it. Single-knob focus on tiny scopes is hard to manage at high power.
Metal frame
A metal arm and base resist vibration and last longer than all-plastic bodies.
Head type
Monocular heads cost less and suit short sessions. Binocular heads are more comfortable for longer viewing. Trinocular heads add a camera port.
Iris diaphragm
This adjustable opening controls contrast. A scope without one often looks flat or washed out.
Power source
Plug-in models give steady brightness. Rechargeable cordless models are useful where electricity is unreliable or when you want to carry the scope outdoors.
Types Compared at a Glance
| Feature | Compound | Stereo | Digital/USB | Handheld |
| Best for | Cells, microbes | Insects, coins, rocks | Sharing, recording | Quick outdoor checks |
| Typical power | 40x-1000x | 10x-40x | Varies | 20x-100x |
| Image | Flat, reversed | Upright, 3D | On screen | Direct view |
| Ease for beginners | High | Very high | High | Very high |
| Upgrade path | Excellent | Good | Limited | Limited |
Pros and Cons by Type
Compound microscope
- Pros: reveals cell-level detail, works with prepared slides, strongest upgrade path
- Cons: needs sample preparation, slightly steeper learning curve
Stereo microscope
- Pros: no sample prep, natural orientation, great for children and crafters
- Cons: lower magnification, cannot show cells
Digital microscope
- Pros: easy to share and record, comfortable posture
- Cons: inconsistent quality, software issues, zoom claims can mislead
What Does a Beginner Microscope Cost?
Prices shift with brand, shipping and import duty, so treat these figures as rough orientation only. They reflect typical retail listings in USD-equivalent terms.
| Tier | Approximate range | What to expect |
| Entry | Under about $50 | Basic or toy-grade optics, often plastic parts |
| Beginner sweet spot | About $80-$250 | Glass optics, LED, mechanical stage, metal frame |
| Serious hobbyist | About $250-$600 | Better objectives, binocular or trinocular head, camera option |
The sweet spot is where most serious beginners get the best return. Below it, you risk a scope that frustrates you. Above it, you are paying for features a beginner may not use yet.
Is a Kit Worth It?
A kit bundles the microscope with slides, cover slips, tweezers and sometimes stains. That convenience is real, but the quality of the microscope itself matters more than the number of accessories.
Be wary of kits that list dozens of accessories on a plastic-lens scope. A smaller accessory set with a better microscope is almost always the smarter buy.
Where to Buy and What to Check
Typical sellers include specialist optics retailers, science-education suppliers, general online marketplaces and hobby shops. If you search for a “microscope shop near me,” local science-supply and optical stores often let you try the focus knobs before buying.
Whatever the seller, check these points:
- Written warranty and return window
- Availability of spare bulbs, slides and eyepieces
- Voltage and plug type for plug-in models
- Safety marks such as CE or UL-type labels on powered lamps
- Toy-safety labeling on children’s kits, which varies by region
Regional Notes
In North America and Europe, specialist retailers and educational suppliers are easy to find. In South Asia, the Middle East, Africa and parts of Southeast Asia, imported models vary in availability, so confirm spare-part access and consider a cordless model. In Australia and the UK, both local distributors and online sellers are common.
Used and Refurbished Lab Microscopes
A second-hand student or lab microscope from a reputable seller can offer excellent optics for the price. Inspect the objectives for scratches or fungus, test the focus travel, and check that the stage moves smoothly.
Be cautious with unbranded listings that give no information about the lenses. If you cannot confirm the condition, a new mid-range scope is safer.
When a Microscope Is Not the Right Purchase
A full microscope can be overkill if you only want a closer look at fabric, print or small hardware. A pocket magnifier or a phone clip-on macro lens may do the job at a fraction of the cost.
The limits are real, though. Phone lenses offer a narrow field of view and lower resolution, so they work for casual curiosity rather than learning microscopy.
Your First Weekend: Setup in Nine Steps
- Set the microscope on a stable, level table near an outlet, or with a charged battery.
- Rotate the nosepiece to the lowest-power objective, usually 4x.
- Place a prepared slide on the stage and secure it with the clips.
- Switch on the LED and set a comfortable brightness.
- Turn the coarse focus knob until a shape appears.
- Sharpen the image with the fine focus knob.
- Move up to 10x, refocus, then try 40x.
- Adjust the iris diaphragm until contrast looks natural.
- When finished, return to the lowest power, lower the stage, switch off the light and cover the scope.
Never crank the coarse focus at high power while looking through the eyepiece. You can crack the slide or damage the objective.
Five Easy First Specimens
- Onion skin: a thin layer shows cell walls clearly
- Pond or puddle water: a wet mount often reveals algae and tiny swimmers
- Leaf peel: the surface layer can show stomata
- Salt, sugar and sand: compare crystal shapes
- Hair or fabric fibers: a good test of focus and lighting
For insect wings or small mineral grains, a stereo scope or the upper light on a compound scope works better.
Accessories Worth Buying First
- A set of blank slides and cover slips
- Lens paper and a blower brush
- A small dropper and tweezers
- Simple stains such as iodine or methylene blue, used with proper care
- A dust cover
Skip fancy extras until you have used the basics for a few weeks.
Common Mistakes to Avoid
- Chasing the biggest magnification number. Claims of 1500x or 2000x on budget scopes rarely deliver usable detail.
- Accepting plastic optics. They limit clarity from day one.
- Ignoring the stage. Without mechanical control, slides drift at 400x.
- Choosing the wrong type. A compound scope cannot show a coin’s surface well, and a stereo scope cannot show cells.
- Over-lighting the sample. Too much light washes out contrast, so use the diaphragm.
- Skipping spare-part checks. A fused bulb should not end the hobby.
Safety and Care
- Supervise children and teach them to carry the microscope with two hands.
- Never use direct sunlight or a mirror aimed at the sun. It can cause serious eye injury.
- Handle glass slides and cover slips carefully.
- For cheek-cell samples, use clean swabs, wash hands, and discard samples hygienically.
- Keep lenses clean with lens paper only, and store the scope in a dry place to prevent fungus on the optics.
Key Terms at a Glance
- Objective lens: the lens closest to the specimen
- Eyepiece (ocular): the lens you look through
- Numerical aperture: a measure of an objective’s detail-resolving power
- Parfocal: objectives that stay roughly in focus when switched
- Working distance: the gap between the objective and the specimen
- Wet mount: a slide made with a liquid sample under a cover slip
- Köhler illumination: a method of lighting for even, high-contrast images
Frequently Asked Questions
1.What is the best microscope for a beginner at home?
A glass-optics compound microscope with 40x to 1000x, LED light and a mechanical stage suits most beginners. Choose a stereo microscope if you mainly want to look at insects, coins or rocks.
2.What magnification do I need for a home microscope?
Most people get excellent results between 40x and 400x. That range shows plant cells, pond life and fibers. Higher power needs very good optics to be useful.
3.Can I see bacteria with a home microscope?
Sometimes. With good optics, a stain and oil immersion at around 1000x, bacteria appear as tiny shapes. You will not see fine internal detail, and viruses are beyond the reach of any light microscope.
4.Is 1000x enough for home use?
Yes, for almost everyone. The limit is not the number but the quality of the objective and the lighting. A sharp 400x view beats a blurry 1000x one.
5.Is a monocular or binocular microscope better?
Monocular models cost less and work fine for short sessions. Binocular models are more comfortable for long viewing and for adults sharing the scope.
6.Are cheap microscopes worth buying?
Very cheap models are fine for casual curiosity. For real learning, plastic optics and wobbly stages become frustrating, and a modest step up to glass optics usually pays off.
7.Are toy microscopes worth it?
They can spark interest in a young child, but they rarely produce clear images. A simple beginner compound scope is a better long-term choice.
8.Is a digital microscope good for beginners?
Yes, if you want to share or record what you see. Check resolution and whether the magnification is optical or digital zoom.
9.What can I look at with a beginner microscope?
Onion skin, leaf peels, pond water, crystals, hair, fabric fibers, insect parts and prepared slides.
10.Is a microscope safe for kids?
Yes, with supervision. Avoid sunlight as a light source, handle glass slides carefully, and choose a sturdy model.
Practical User Experience
This guide is not based on hands-on testing of one specific model, so what follows describes what beginners commonly run into with entry-level and mid-range compound microscopes, not a personal review.
The first session usually goes best at low power. A prepared slide is easy to find at 4x or 10x, but the image often drifts out of focus when you switch to 40x. A gentle turn of the fine focus knob is normal, not a fault. Without a mechanical stage, slides tend to drift as you try to center a specimen.
Lighting is the next surprise. Full brightness often washes out transparent samples such as onion skin or pond water, and closing the iris diaphragm slightly brings cell walls into view. Wet mounts take patience: air bubbles and thick samples are the usual cause of murky images, rather than a faulty scope.
Comfort matters more than most buyers expect. A monocular head suits short sessions, while longer ones tend to be easier on a binocular head. A steady table also reduces vibration at 400x.
Overall impression: a glass-optics compound microscope with a mechanical stage rewards a few evenings of practice with clear, satisfying views. Expect a short learning curve, and treat the first weekend as practice rather than a test.
Conclusion
The right beginner microscope is the one that fits what you want to see, gives a clear image on the first evening, and leaves room to grow.
For most people, that means a glass-optics compound microscope with 4x, 10x and 40x objectives, a mechanical stage and LED lighting. If your interest leans toward solid objects, choose a stereo microscope instead.
Before you buy, follow these steps:
- Decide what you will look at most.
- Set a budget and favor glass optics and a mechanical stage over big magnification claims.
- Check warranty, returns and spare-part availability in your region.
- Pick up slides, cover slips and lens paper.
- Start with onion skin and pond water, then explore stains and prepared slides.
A good first microscope turns a quiet weekend into a small expedition. Choose well, and it will keep rewarding your curiosity.
Unfulfilled Points: Specific brand names and ISO standard numbers were not included because they need verification, and no author credentials or hands-on test observations were supplied to include.
These information are gathered from different surveys, medical tests and tech giants like Techradar and more. Our top priority is to provide you valuable information about Best Microscope for Home Use Beginners .
For More Details About Different Digital Microscopes Click Here